How To Create A Sharp Stroke Effect In Photoshop
- Alex Ostenberg
- Aug 3, 2022
- 2 min read
Updated: May 28, 2024

Overview:
Learn how to create text with a sharp stroke effect in Photoshop.
The stroke effect creates an outline around text or objects. Depending on your stylistic choice, you can change the outline’s color and width.
When you add a stroke through the layer style menu, the newly created outline on the text has rounded edges and corners. However, many types are defined by their sharp look. Create a stroke with sharp edges and corners by following the steps below.
Note: Before you begin, start with a text layer. Remove any existing stroke effect in the layer style menu or click the eyeball toggle. Finalize the content of your text. You cannot edit the content of the text later.
Step-by-step guide:

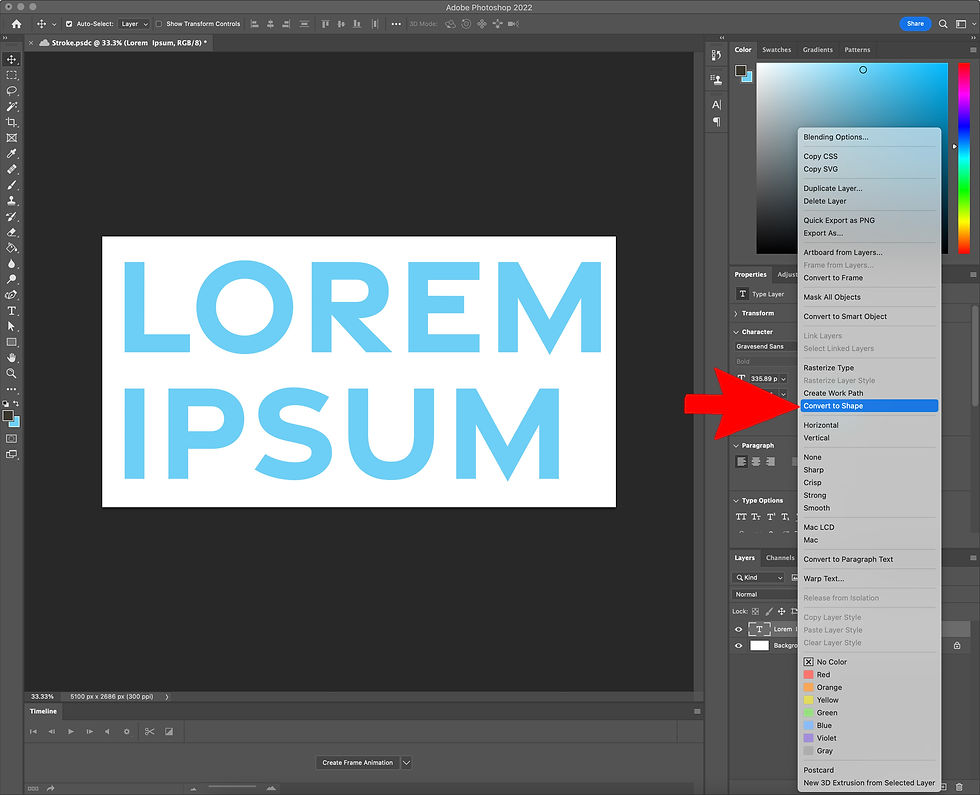
Step 1: Convert Text Layer to Shape.
Right-Click the Text Layer. A menu will appear. Select Convert To Shape. Your Text Layer is now a shape in a Vector Layer. Remember, you cannot edit the content of the text going forward.

Step 2: Click the Direct Selection Tool.
On the tools panel on the left, click the Direct Selection Tool. It looks like a mouse pointer. Right-click and make sure the Direct Selection Tool is active. If it's active, a dot will appear to the left of its name and symbol.

Step 3: Click inside the Shape with the Direct Selection Tool.
Click anywhere inside your text shape with the Direct Selection Tool. Now the selection is outlined.

Step 4: Adjust the Stroke Color and Width.
While the text shape is still selected, navigate to the top control panel.
1. Click Stroke to change the outline color.
2. Click the 1 px drop-down menu to change the stroke width. Either enter a numerical value or slide the slider from left to right (smaller to larger).

Step 5: Review and You're Done - Good Job!
Click outside of the text. Review the new sharp stroke you created, and make any desired adjustments.


Kommentare